I needed to make a gift for a friend of mine who just had an absolutely adorable baby. I love to make things for babies - quilts, bibs, stuffed animals, binky clips... all sorts of things. However, not knowing the baby's gender or what sort of theme they might have picked limited my options (my quilts are generally themed and somewhat artsy), and I wanted something quick so I could have it ready when the baby was ready for us to visit.
Backstory: I had seen this growth chart at
whipperberry.com and thought it looked really cute, but I wasn't totally sold on the safety pins and was having a hard time finding the supplies.
How I did it: It took a while but I finally found all the materials. The jute was tough to find, although I did manage to stumble across it at a local JoAnn Fabrics. I also bought a package of small clothespins instead of safety pins and tags (which I was having trouble finding), and I thought the clothespins were slightly safer. I had been eyeing up multicolored Sharpies so I used this project as an excuse to buy a package, and also bought a pack of extra-fine point black Sharpie markers. From my home stash I used a scrap of black fabric, some maroon thread, and two grommets. I made my own stencils using index cards and a utility knife.

The first thing I did was finish up the bottom edge with the black fabric. I probably could have just cut the end neatly and left it, but I wanted to have a more finished edge. After finishing the edge, I marked off the inches up to 6 foot 6 inches (figuring that it would be highly unlikely knowing this couple that their children would end up that tall). Once that was done, I went back and lengthened the even inch marks to the close edge of the red band, and the foot marks to the other edge of the red band.

For the numbers, I used index cards and designed numbers with a slightly whimsical shape, and sized up the 1-6 designs for the foot notations. To make them stencils, I cut them out with a utility knife (using a fold of a cardboard box as a surface to cut on). I centered the numbers vertically with the marks for the odd inches, and once I got to the two digit numbers just tried to keep the spaced appropriately. For the odd inch numbers I used black Sharpie, and for the foot numbers I used colors. At first applying the numbers I thought I might have done them a shade too large, but by the time I finished I liked the way it looked.
I folded the top edge over and inserted two grommets so the growth chart can be hung in a doorframe or on a wall. If you've never inserted grommets before, they are two pieces of metal that make a neat hole through fabric (like an eyelet, except an eyelet is only one piece). Most come with a little setting tool you bang on with a hammer or mallet, or you can use a plier set specifically designed for inserting grommets. For the jute (and many other fabrics) I suggest using an awl (or start with a pin, pencil point and then use a chopstick) to stretch the fibers around a space big enough for the grommet shaft to go through. You could punch a hole, but then risk tearing out or fraying because the threads that make up the fabric are broken. This is easy to see with the jute, where you can actually see the vertical and horizontal threads.

The height markers are the little clothespins. For this gift I had received a birth announcement so I was able to put the baby's height, weight, and date of birth on the little clothespin. I wrote her name on the back.
(Side note: I had considered putting the baby's name on the chart, but thought that if the couple decided to have more children they could use it for all their children if the name wasn't on it. They can write the child's name on the back, paint the clothespins different colors, put one child's clothespins on the left and the other's on the right... there are tons of options. When I gave it to them I joked that the baby's children could use it someday, which made her mother well up at the thought of her just born baby being grown with children of her own; they also joked about putting clothespins on for themselves, and how they'd get shorter.)
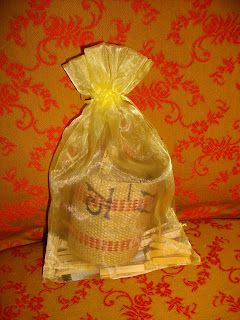
I put the rolled up growth chart in a tulle bag that I happened to have around, with the little clothespins and a black extra fine Sharpie. You could easily do a cute box like she does on the above referenced resource blog entry, or make a custom bag, or attach a smaller bag with the clothespins to the chart itself... so many options for packaging and presentation.
What I learned: I should have probably marked the foot measurements first, but if I had I might have had a problem fitting the inch measurements. I also learned that a thoughtful gift can make the appreciative recipients tear up, so including tissues is something you might want to consider.
What I might try next time: I'll probably not change anything. Maybe do a different stencil, maybe try the smaller numbers for the inches. I am actually going to be making another one for next weekend, so I'll post an update about how that one turns out.
Final Thoughts: This was really cute, didn't take a terribly long time, and the recipients loved it. I think it'll get tons of use and it definitely can be used for multiple children and even multiple generations. It's a great project!


No comments:
Post a Comment